Image
Declaring your major is an important milestone in your academic journey. The process is designed to help you reflect on your academic goals, map out your remaining semesters, and transition confidently into your chosen field of study.
You’ll complete four steps:
Details for each step are found in the dropdown menus below.
Please take a few minutes to complete the brief, Pre-major Advising Survey. Your responses are shared with the Academic Advising Center in aggregate form only—no individual students will be identified. Your honest feedback helps us strengthen advising for future students.
Stellic is a degree planning and auditing tool that helps you map out possible pathways toward graduation.
In this step, you’ll create a full academic plan for your remaining semesters. Be sure to include all intended majors, minors, certificates, and any concentrations.
This is your opportunity to think ahead and build a path that aligns with your academic goals. Your plan doesn't need to be perfect, but it should be realistic and satisfy all requirements. Your four-year plan is a working document that can change as your progress.
See how to use Stellic to create a four-year plan in this short video.
Follow the instructions below, and you can also view a Stellic Help Guide for more information.
Image
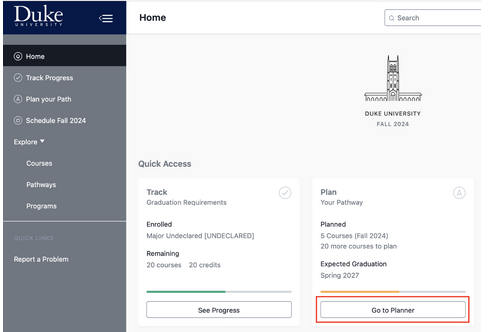
| Step 1 Log into Stellic and select Plan Your Path. |
Image
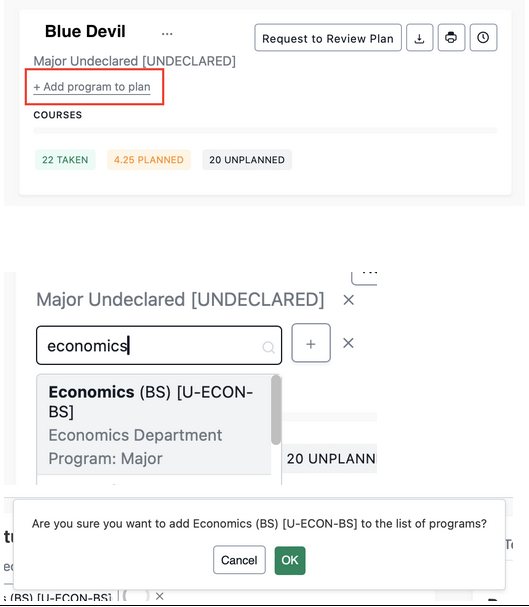 | Step 2 Click on the Add program to plan button to select your intended primary major (either AB or BS). Next click the Plus sign button next to your major and then confirm your choice with the OK button. If you are planning to double major, or add a minor or certificate, repeat this step to add those. You can refer to this guide for additional guidance. |
Image
 Image

| Step 3 Click the Refresh icon under the Progress tab, to update your plan after making changes. When planning for "study away" you may not know exactly what courses you will take while abroad so select courses (or general placeholders) for the Trinity or major/minor requirements you think you might take. This will be an educated guess and it is fine that it won't be exact. |
Image
 | Step 4 You can find courses via the Search Courses tab, or find courses that fulfill requirements under the Progress tab.
|
Image
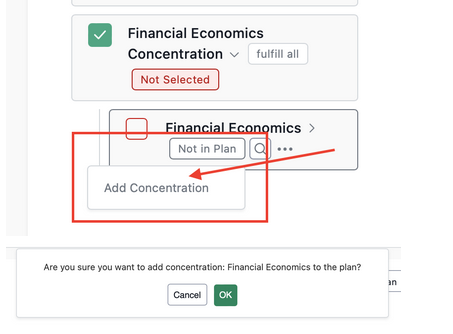 | Step 5 If a major has concentrations, you can select one by selecting Not in Plan, and then Add Concentration. Select OK to add the concentration. |
Image
 Image
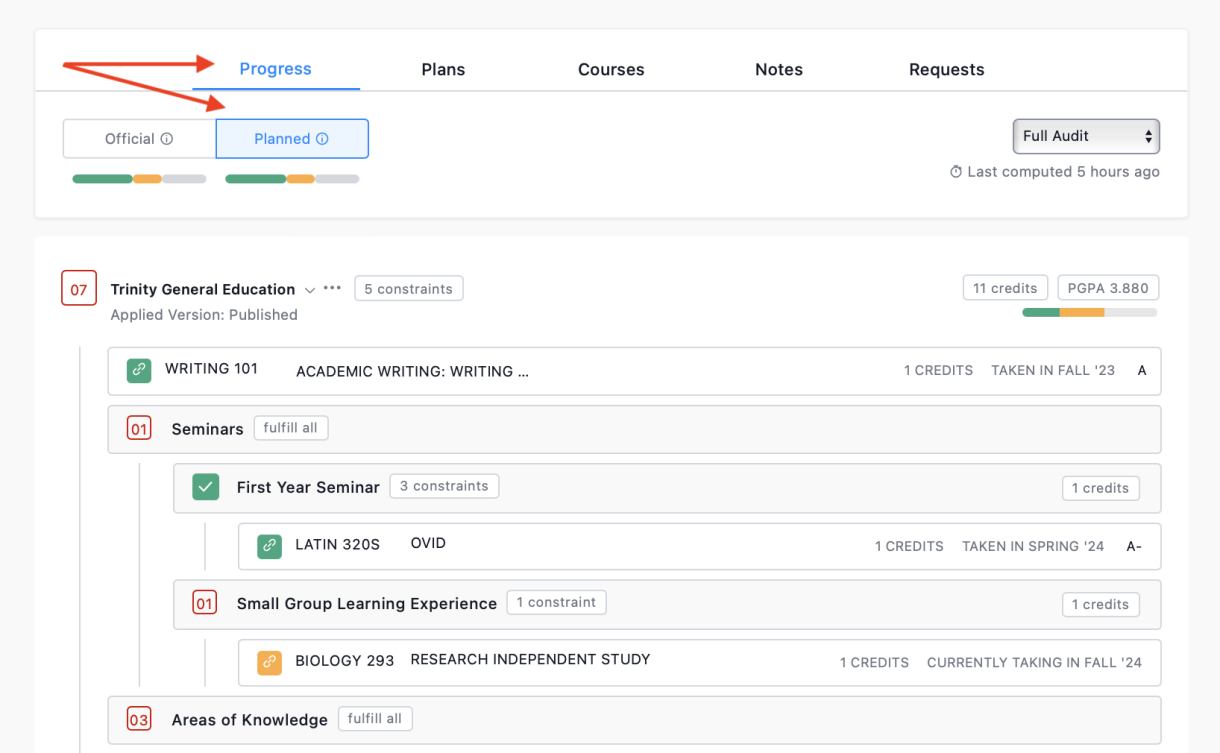
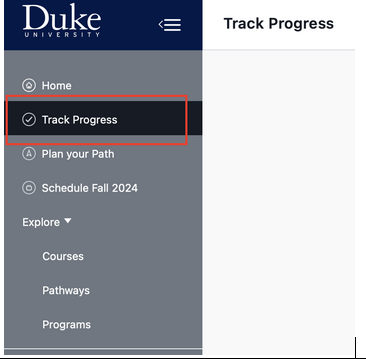
| Step 6 When you’ve finished assigning your remaining requirements to future semesters, confirm that all your requirements are satisfied by selecting Track Progress, and then select the Planned audit under the Progress menu.
|
Image

| Step 7 Next, you need to generate a PDF of your plan. Scroll up to the top of the page and click the printer icon to download a PDF of your plan. Make sure the format is set to Standard, the version is Planned, and all of the programs you want included are selected. Select the Create Audit Report button, and then name and save your PDF. You will attach a copy of this document to your Major Declaration Form. |
Please complete the Major Declaration Form, to which you will attach the copy of your four-plan from Stellic. Once you have submitted this form, the Academic Advising Center will review your four-year plan and program selections. If edits are required, you will be receive an automated email from "Kuali Notifications" requesting changes.
After approving your plan, the AAC will notify you and give you access to the Academic Plan Change menu in DukeHub, where you will officially declare your major.
Once you have received email confirmation from the Academic Advising Center [via "Kuali Notifications"] that your major declaration plan has been approved, you will have access to the Academic Plan Change menu in DukeHub, where you will formally declare your major.
Your major is not declared until you complete the steps below in DukeHub.
Failure to do so will result in future registration blocks.
You can return to the Academic Plan Change form at any time to make changes—adding, removing, or updating your plans as needed.
For information on advising in your department, visit this page.
Image
 | Follow these instructions to declare your major in DukeHub:
|